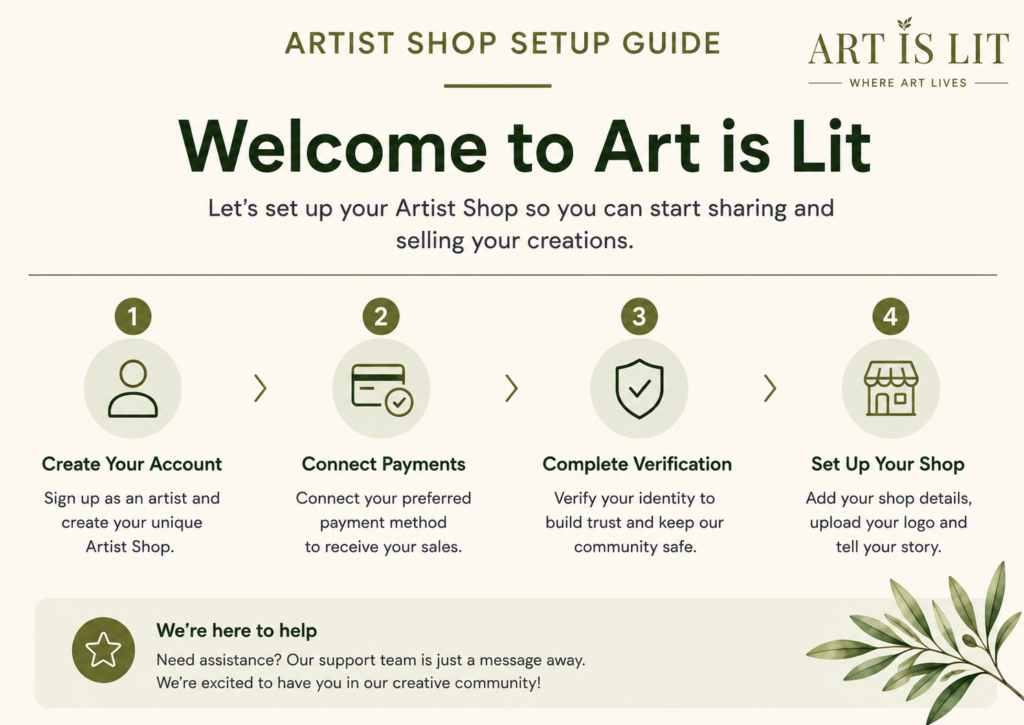
Everything you need to get started
Welcome to Art is Lit. We’ve made setting up your Artist Shop as simple as possible. Follow our step-by-step guide below to set up your studio, connect your payments and complete your verification, so you can start sharing and selling your creations.
Step 1 — Create Your Artist Account
Start by creating your Art is Lit artist account. Follow the steps below to register, confirm your email and create your password.
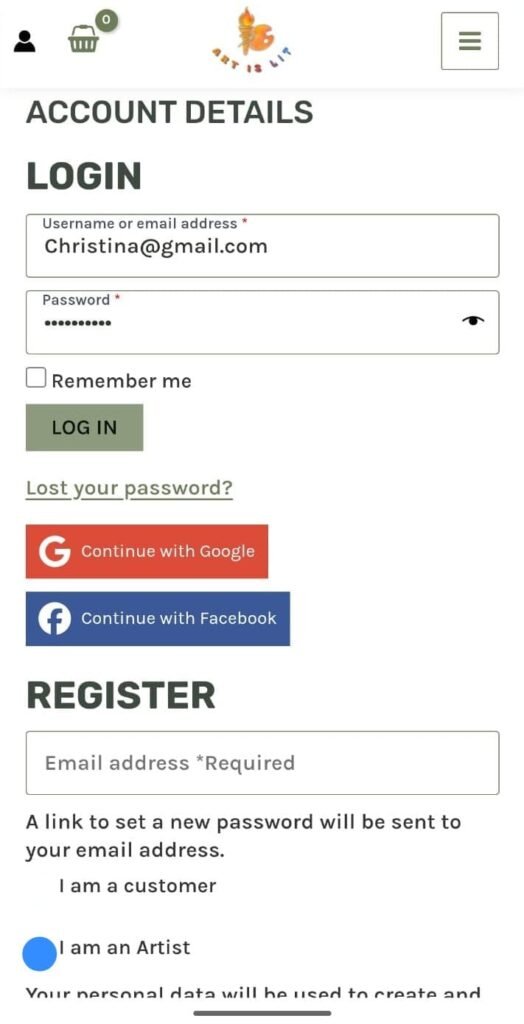
Step 1A – Register for your Artist Account
Enter your email address, select “I am an Artist”, then click Register.
Step 1B – Check Your Email
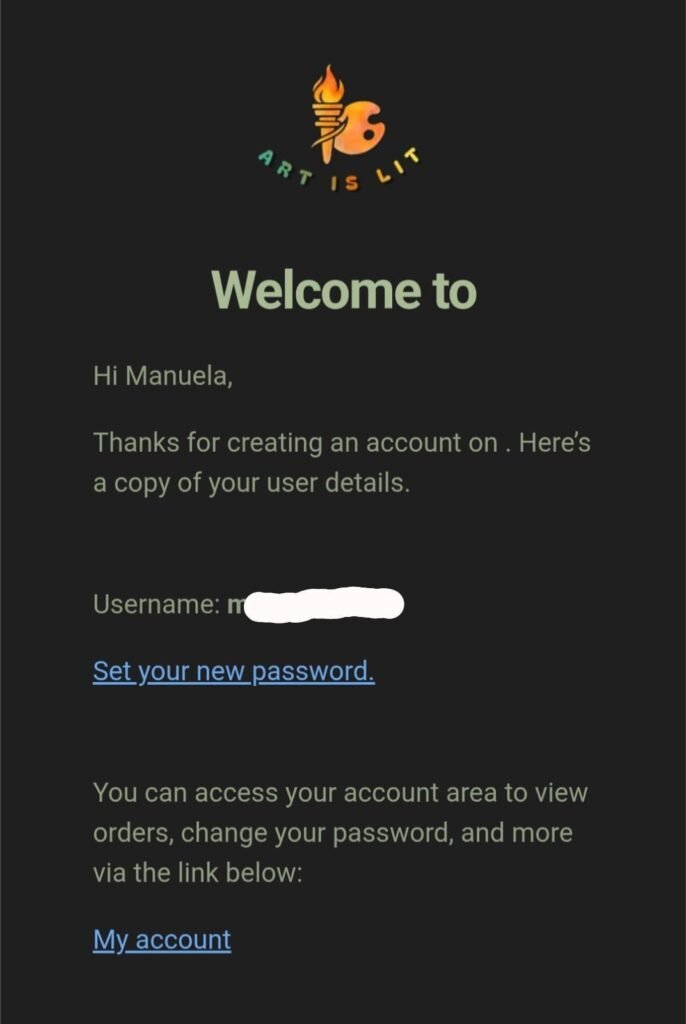
After registering, check your inbox for an email from Art is Lit.
Click “Set your new password” in the email to create your password.
Step 1C – Sign In to Your Account
Once you have created your password, return to Art is Lit and sign in using your email address and new password.
After signing in, you’ll be ready to begin setting up your Shop.
Step 2 – Set Up Your Shop
Now it’s time to personalise your Shop.
After signing in, you will first see your Account Details area. You do not need to change anything here to continue setting up your Shop.
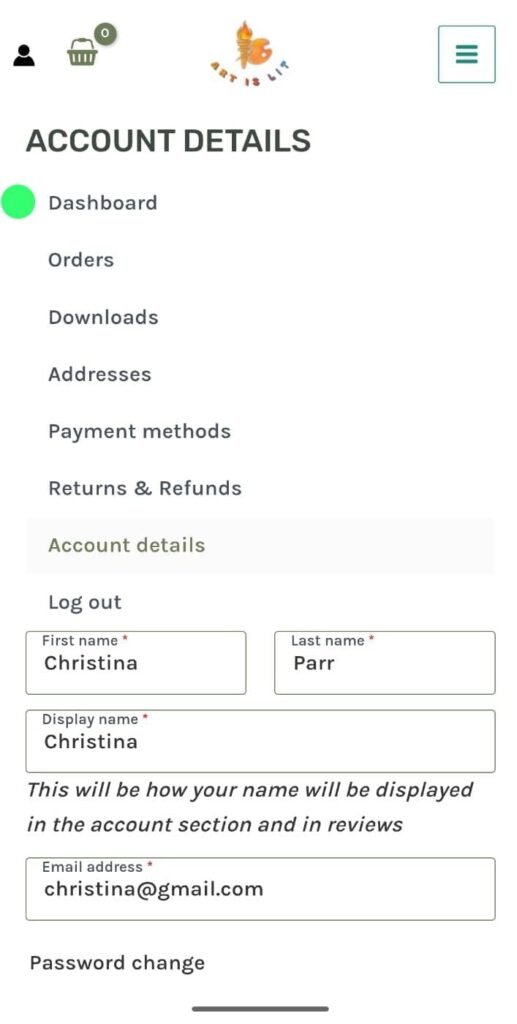
Step 2A – Go to Your Artist Dashboard
Select Dashboard from your account menu.
Scroll down and click “Go to Artist Dashboard.”
This will take you to your Artist Dashboard, where you can continue setting up your shop.
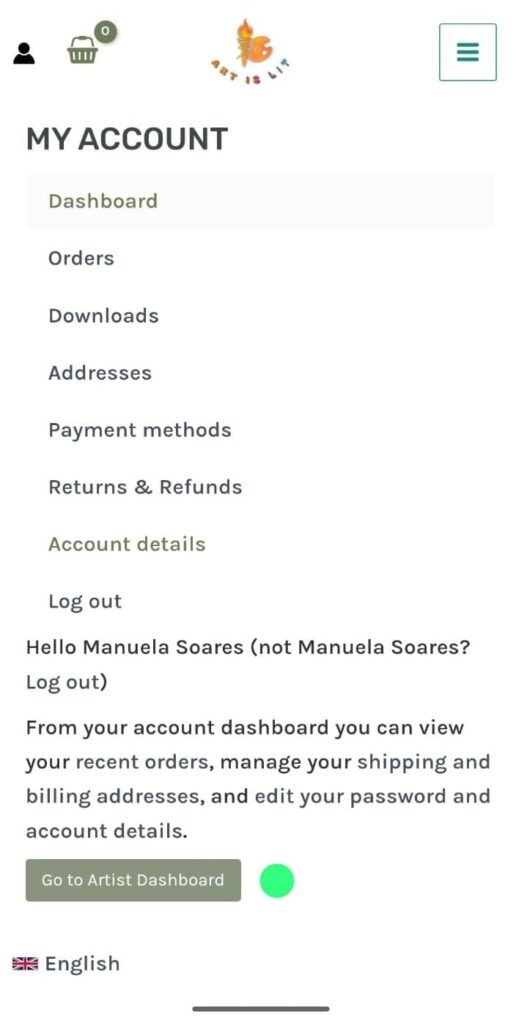
Step 2B – Open Your Artist Studio Menu
After clicking “Go to Artist Dashboard”, you will arrive at your Artist Dashboard.
On mobile, the main menu is hidden to give you more screen space.
Tap the ☰ three-line menu in the top-left corner.
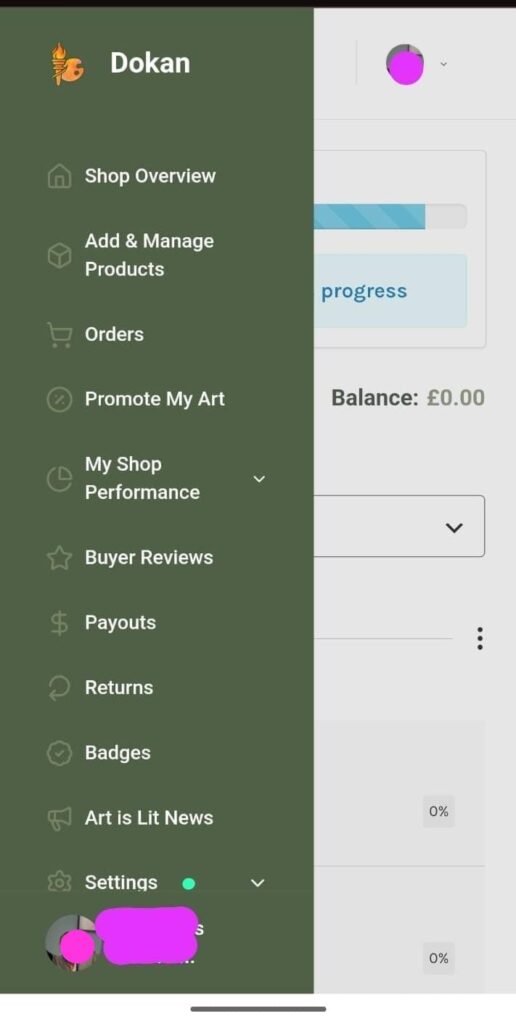
Step 2C – Set Up Your Shop
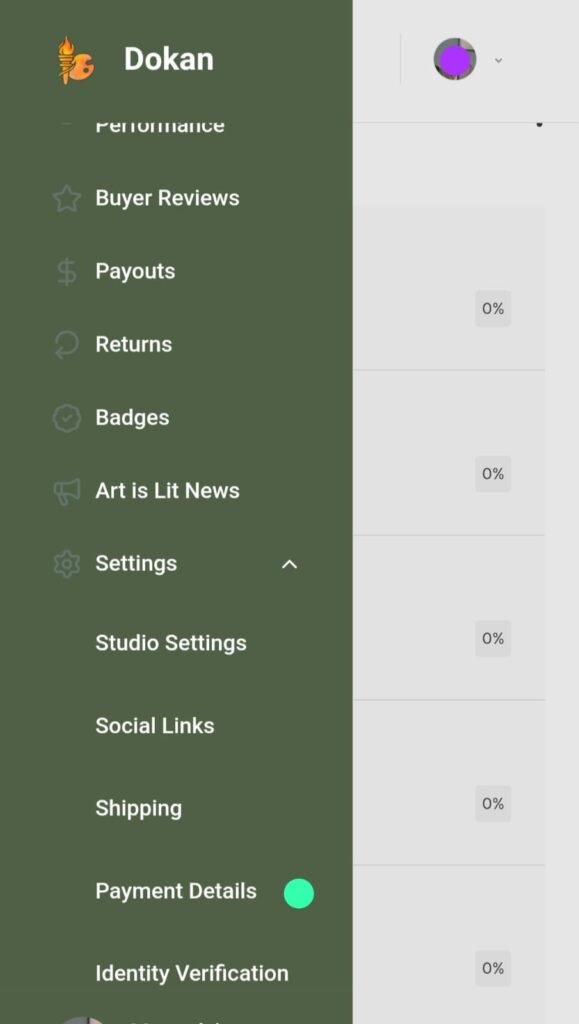
To start personalising your Shop, open Settings from the green menu.
Then tap Shop Settings.
This is where you can manage the main details of your shop and control how your studio appears to visitors.
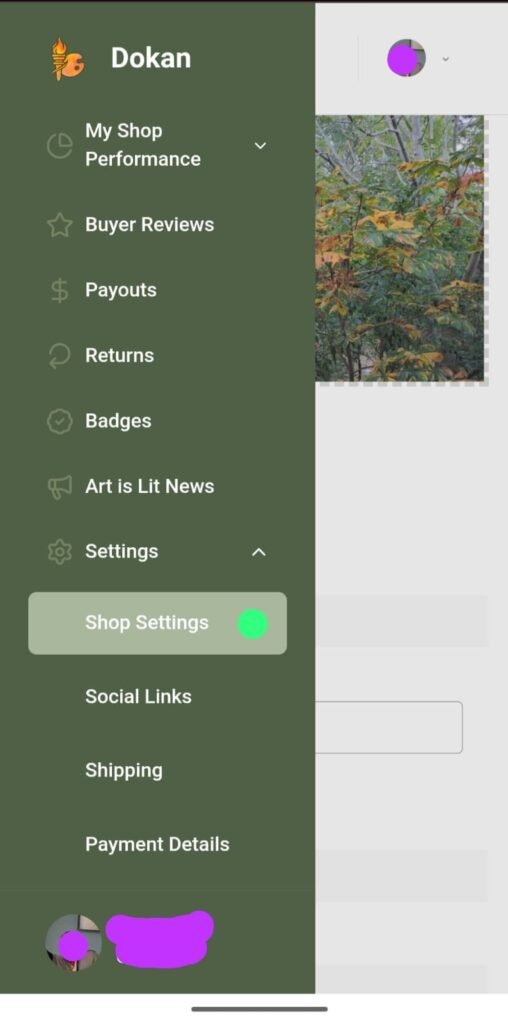
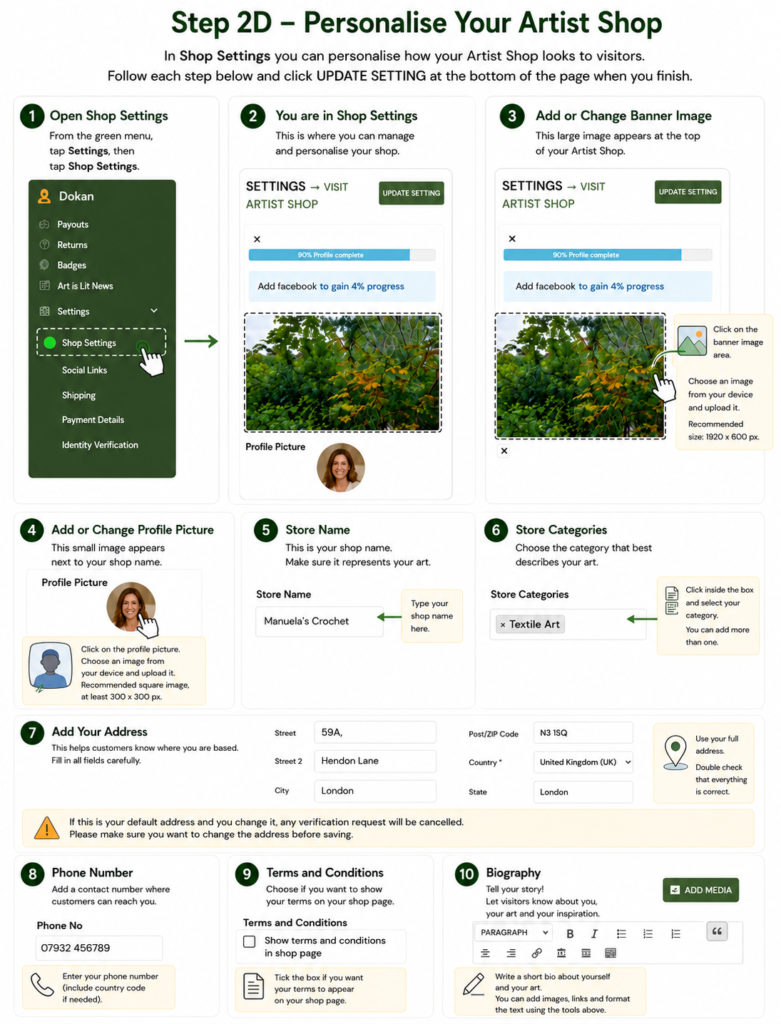
Step 2D – Personalise Your Shop
Make your Shop your own. Add your banner, profile picture, shop name, category, contact details and biography so customers can learn more about you and your art.
Step 3 – Connect Your Payments
Set up your payment details so you can receive money from your art sales. We’ll guide you through the process step by step.
Step 4 – Complete Your Identity Verification
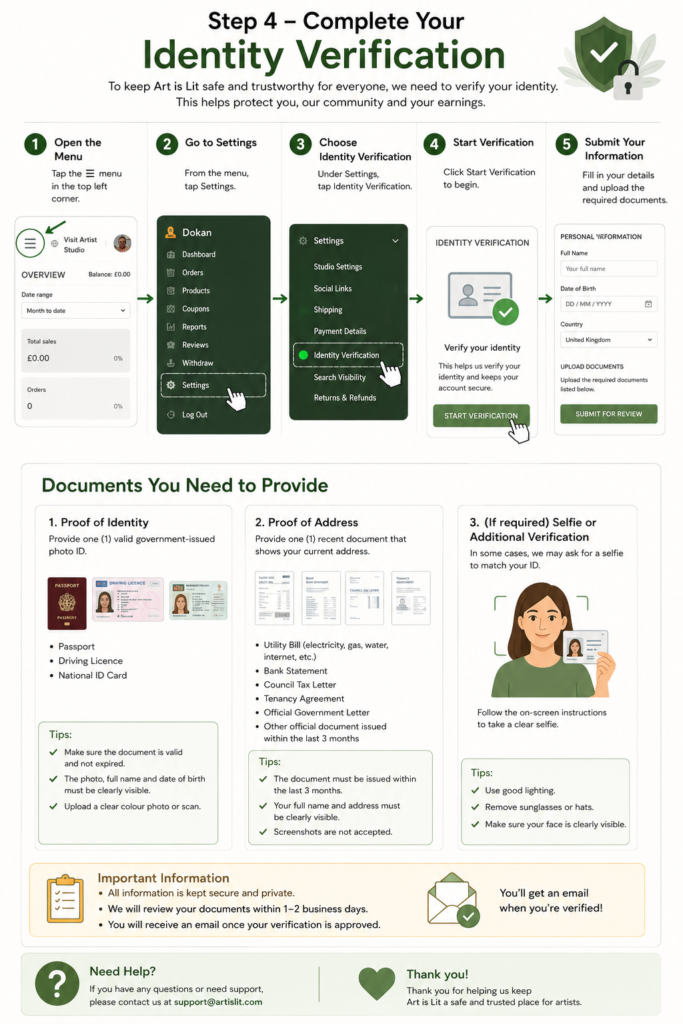
To help keep Art is Lit a safe and trusted marketplace, we ask every artist to complete a simple identity verification before selling their work.
We ask for proof of identity to confirm that you are who you say you are and to help protect artists and buyers from fraudulent accounts.
We also ask for proof of address to confirm your current address and provide an additional level of account security.
Your information is used only for verification and security purposes and is handled securely. Completing this step helps us build a marketplace where artists can sell and buyers can shop with greater confidence.
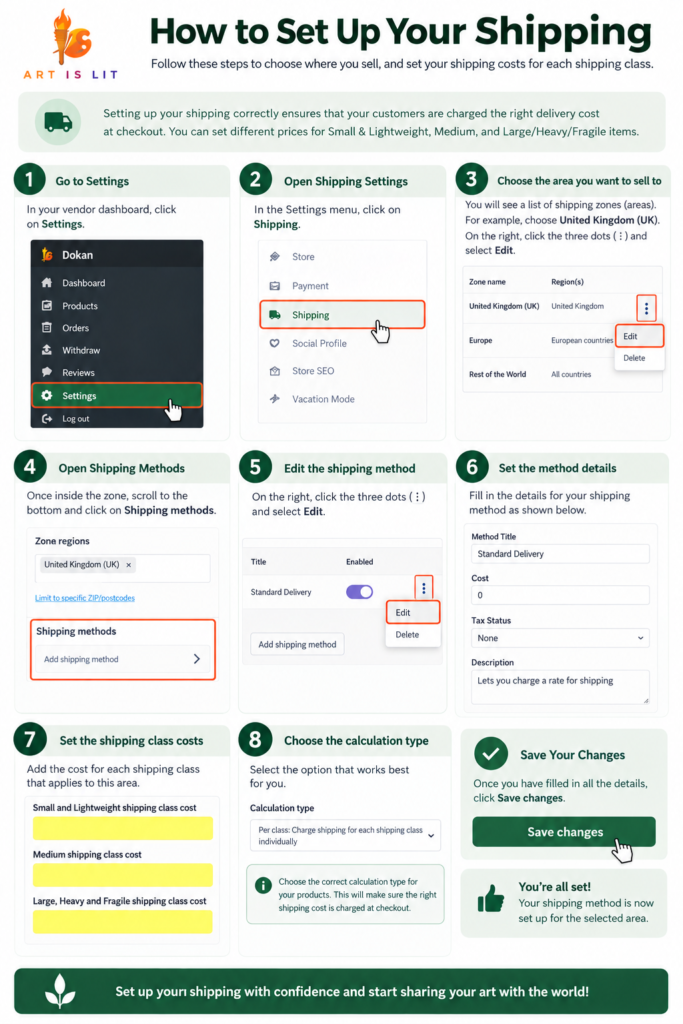
Step 5 – Set Up Shipping
Before you start selling, it’s important to set up your shipping correctly so customers are charged the right delivery cost at checkout.
In your Artist Dashboard, you can choose the areas you would like to ship to and set different prices for Small & Lightweight, Medium, and Large/Heavy/Fragile items.
The guide below will take you through each step. Once your shipping is set up, the correct delivery charge will be applied according to the shipping class you select for each product.